


Table Of Contents
- The Car Engine Sound Primer – Mike Caviezel
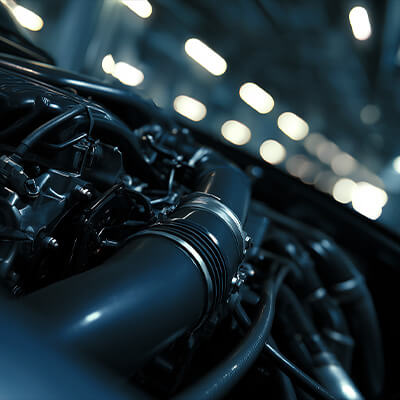
- Why Engine Sound Defines A Vehicle
- Loops or Granular? Choosing Your Engine Playback Strategy
- The Four Core Engine Perspectives
- Loops VS Granular: Asset Count, Control, And Tradeoffs
- From Assets to Game: High-Level Implementation Goals
- Throttle is Everything: On-Load VS Off-Load Sound
- Test Files & Example Project
The Car Engine Sound Primer – Mike Caviezel
We know at BOOM Library that sound professionals are busy, and most of us only slow down for something that feels genuinely useful. This is one of those pieces.
Mike Caviezel has spent over 20 years designing vehicle audio for games, including long stints on Forza and Gran Turismo. In this article, he breaks down how he approaches engine sound design at a practical level, from the early decisions that shape an entire system to the real-world trade-offs between loop-based and granular approaches.
This is not a quick skim or a collection of tips. It is a clear, experience-led walkthrough of how interactive engine sounds are built and why certain methods work better than others in production. If vehicle audio is part of your work, or likely to be, this is the sort of deep context that helps you make better choices before you ever open a DAW or middleware session.
It takes a few minutes to read properly, but it rewards that time. And at the end you can download some test files to experiment with!

Mike Caviezel – Principle Sound Designer
Gran Turismo / Forza Series / Rocket League
Meet Mike
Hi there. I’m Mike Caviezel, and I’ve been making sounds for games for over 20 years, in particular, racing games! I’ve worked for both the Forza & Gran Turismo franchises, as well as designed vehicles in a handful of other games, and I’d like to share with you my high-level approach for designing & implementing interactive vehicle sounds.
To narrow this article down a little, I’m going to be focusing on the Engine component of the vehicle sound. There are actually a lot of other components that go into the total vehicle sound experience (Tire SFX, Wind/Road noise, shifting SFX, etc), but the basic character of any vehicle is usually defined by its Engine sound, so I’ll concentrate on that for this article.
Start With Physics: What Data Do You Actually Get?
When designing an interactive vehicle model, specifically the engine sound, one of the first questions to ask is, what vehicle physics parameters will I have to work with? If the vehicle I’m designing sound for has an Internal Combustion Engine, then I am always going to ask for Throttle and RPM physics from the game. Electric vehicles need a different set of physics inputs (more on this in the future), but for gas-powered Engines, for basic playback, Throttle and RPM data will get you most of the way there.
Loops or Granular? Choosing Your Engine Playback Strategy
Another big question to ask is – Loops vs granular? What I mean by this is, how will you be implementing your recorded sounds? As of this writing, the common wisdom is that there are 2 basic approaches to using car recordings in interactive models, which require very different approaches to the source content you will need to use:
1. Loop-Based Engine Sounds: The Traditional Approach
With a loop-based approach, you will need a series of short, steady, looping engine samples, recorded at various RPM points across the entire rev range of the engine, that will pitch up & down & crossfade in & out of each other based on Game Engine RPM. In musical terms, think of a telling a brass player “OK, hold a loud, high C for about 4-5 seconds”, and then, “OK, now go a whole step down to Bb and do it again”, and those are what your Engine sound files will look & sound like. These types of Loops are often generated by putting a car on a dynamometer and having it hold steady RPM.
How Many RPM Loops Do You Really Need?
For my loopset, I will try to create engine samples every 500 RPM or so, along with an Idle sample (I actually like to use samples every 250 RPM at lower RPM ranges, but that’s not always possible). The reason for samples every 500 rpm is that samples can start to sound stretched if you pitch them up or down further than 500 RPM.
You can find these types of recordings in the BOOM library vehicle recordings, labeled as “Onboard Steady”.
2. Granular Synthesis: Fewer Files, but Higher Cost
With a Granular Synthesis playback engine (such as the fantastic REV from Crankcase audio), instead of loops, you will need Acceleration & Deceleration ‘ramps’ (sound files), that go from low to high RPM, that are each around 10 seconds long. The Granular playback software will then attempt to stitch together small ‘grains’ (i.e. super short samples) that are derived from various RPM areas of these ramp sound files, which will then map to the RPM range of the game car physics. Think of it as time compression & expansion of your ramp sound file, but done in real-time according to your game RPM physics. Keep in mind, A granular playback system will hit your CPU harder than a loop based system will, and an off the shelf system like REV will cost additional money.
Acceleration & Deceleration Ramps Explained
The acceleration ramp will ideally be an uninterrupted, single gear recording of the car going full-throttle through the whole rev range of the engine, starting very low in the RPM range and accelerating all the way up to redline. Additionally, you’ll also need a deceleration ramp, which is the sound of the car decelerating naturally (off-throttle) from redline back down to idle. In musical terms, think of the car doing a full volume ‘glissando’ from its lowest note all the way to its highest note, and then doing a weak glissando back down to the lowest note.
These types of recordings are usually done by driving the car on a track or closed road.
You can find these types of recordings in the BOOM library vehicle recordings, labeled as “Onboard Ramps”.
Once you’ve decided on Loops vs Granular, then the real work begins! As with all things in audio, you’ll need to start with great sounding source, ideally recorded from various onboard perspectives. The BOOM library folks have a bunch of great car recordings to choose from.
The Four Core Engine Perspectives
When I’m building a car, I usually divide my sound files up into the following Engine Perspectives (I use these perspectives for both Looping & Granular approaches).
- Exhaust. The exhaust note is the primary character of a car’s sound, and is usually recorded with mics next to the tailpipe.
- Engine. This is the sound of the engine in the engine bay, which can help give fidelity & clarity to a car’s sound.
- Intake. This is an often overlooked part of Engine sound, and it’s the sound of air rushing into the engine when the throttle body is open (i.e. full-throttle), usually recorded with a mic in the actual car intake path. This sound is actually quite loud in a lot of cases (Honda S2000, I’m looking at you), and is a big part of the on-throttle sound of a car. This sound importantly is NOT present when you’re off throttle, which will also play into our implementation.
- Interior – what the engine sounds like from inside the car. Some games like to create their Interior sound perspective with actual interior recordings, and some games will try to re-create an interior sound by running the other Engine perspectives through a convolution IR reverb to make it sound like a car cockpit. I’ve done it both ways, and it all comes down to in-game resources (voice count, DSP CPU usage, etc), but good results can be had with either method. Some games don’t even have an in-car camera perspective, so you might not need to deal with it at all in those cases!

Exhaust RPM Loop Layout in FMOD

Intake RPM Loop Layout in FMOD
Loops vs Granular: Asset Count, Control, and Tradeoffs
Here’s how I’d prep my content for each method. Let’s use an old muscle car that redlines around 5500 RPM as an example:
LOOPS
For a looping playback system, here’s what my basic loopset would look like. Each engine perspective will need the following loops:
- A 3-5 second long Idle loop, this will typically be between 600-850 rpm.
- Full-throttle loops, around 1 or 2 seconds long, every 500 RPM, starting from 500 RPM below redline.* CAVEAT BELOW* Then once you get down to around 2500 rpm or so, I like to use loops every 250 RPM, as this will lessen the pitch stretch range needed for each loop (it’s an octave of pitch stretch when you double the RPM – 2000 RPM is an octave above 1000 RPM, etc.) The ideal full set of loops for this particular muscle car would then be:
- 600 rpm (idle) – 3-5 seconds in length
- 1000 rpm
- 1250 rpm
- 1500 rpm
- 1750 rpm
- 2000 rpm
- 2250 rpm
- 2500 rpm
- 3000 rpm
- 3500 rpm
- 4000 rpm
- 4500 rpm
- 5000 rpm (you can stretch this last loop to the 5500 redline)
NOTE: With loops, you will need to find out the ACTUAL recorded RPM of each loop, as that will affect the pitch when you try to crossfade between loops. The reason I say this is because sometimes dynamometers and tachometers don’t track the car’s RPM EXACTLY, so your 4000 RPM loop will actually be more like 4013 RPM, which will cause tuning issues. Here’s a handy formula for checking to see what the actual RPM of a loop is (I use a sine wave generator as a pitch reference to find the actual fundamental of an RPM loop):
Loop Fundamental Frequency *60, then divide that by the # of cylinders, then multiply that result *2. This will equal the exact RPM of your loop. I would then name your file after this result, rather than a rounded-off RPM number.
In your middleware, these Loops will then need to be set up to crossfade into each other, and all use the same pitch curve so they don’t get out of tune with each other at crossfade points. FMOD has a great Autopitch feature to help with this, and in Wwise the Smart Pitch Curve over a Blend Container will do the trick.
So that’s 13 loops for each Engine perspective, multiplied by 4 Engine perspectives (Intake, Engine, Exhaust, Interior), which give us 52 loops total.
Giant Caveat
Up until now, we have only made Full-throttle loops! “But what about off-throttle?”, you say? Well, it’s pretty tricky to generate off-throttle loops, for a myriad of technical reasons I won’t get into here. A lot of games that use loops simulate off-throttle sound behavior by manipulating the on-load (full throttle) loops with in-game DSP, driven off of game physics (EQ & Volume automation mostly, more on this later).
If you have a way to generate off-throttle loops (such as Tazman Audio’s “Engine Loop Creator” (which creates loops from ramps), then have at it, but you will double the amount of loops you will be using in-game, which sometimes will make audio programmers gnash their teeth and swear at you.
And yeah, it’s a fair bit of work to prep all these loops. Believe me, I know. If you can, try and cut all the different perspective loops from the same time slice in a DAW, so that each rpm band has all of its perspective loops at the same pitch. I also like to use Stereo loops wherever I can, but mono may work best for your game.
GRANULAR
Now Granular, on the other hand…you need FAR fewer assets for a basic granular implementation than for a loop-based one. At a basic level, you will need:
- An Acceleration Ramp
- A Deceleration ramp
- An idle loop
And that’s it! 3 files! The trick here is that if you want to do any real-time mixing of different perspectives in-game, these ramp sound files will need to be multichannel files, which may require some code support, as some Granular engines don’t technically support this (although it can be done). - My multichannel source would have this channel layout (all taken from the same time slice in a DAW), but this layout can be whatever your Granular engine supports:
- Ch1 = Exhaust
- Ch2 = Engine
- Ch3 = Intake
- Ch4 = Interior
- If I only had one Exterior Camera perspective to support, and if I could get away with a single, prerendered car engine mix (many non-racing games do this for their vehicles), my source ramps would then be pre-mixed Stereo (or even mono) files, with these mix blends as a rough guide:
- Idle (Mostly Exhaust, a little Engine, no Intake)
- Acceleration ramp (Mostly Exhaust, with some Engine for fidelity, and a good bit of Intake in there as well)
- Deceleration Ramp (same blend, but remove the Intake)

From Assets to Game: High-Level Implementation Goals
With any car engine implementation, the high-level goals are the same:
- Ensure that the audible Engine Audio RPM matches the Game Physics Engine RPM, or at least make it feel that way.
- Have the Engine Audio react to Load (Throttle) in a believable way.
In other words, when I’m full-throttle at 5000 RPM, I should be hearing my on-throttle source recording being played back at 5000 RPM. For Loops, this means hearing 5000 RPM loop, and for Granular, this means hearing the area of the on-throttle ramp that’s at 5000 RPM).
The first thing to take care of is make sure that your loops (or your ramps) are pitching correctly, and that the rev range of your loops is matching well to your game physics. For instance, if your recorded loops have an Idle of 600 RPM and a redline of 5500 RPM, your engine is going to sound pretty weird if your in-game physics are making the car idle at 1500 RPM and go up to 8000 RPM! Make friends with your vehicle physics programmers. Trust me, you may need to work with them a lot to get your stuff to sound right!
For Loops, I will set up a separate layer (or Blend Container) for each Engine Perspective, and then lay out my loops using RPM as the scale.I like to use 250 RPM crossfade lengths for each of my 500 RPM loops, and then have shorter 125 RPM crossfade lengths for my 250 RPM loops.
For Granular, you only need to specify a crossfade length from idle into the rest of the RPM range, the Granular engine will take care of the rest.
Throttle Is Everything: On-Load vs Off-Load Sound
Once the pitch range of your vehicle is sounding right, it’s time to think about Throttle! Your engine needs to sound different when it’s accelerating vs decelerating, and Throttle physics are the key to this.
Granular Systems: Automatic Load Handling
If you’re using a Granular system, you only need to feed it Throttle data, and once the Granular sees your game throttle physics data, it will automatically switch/blend between your On-Throttle ramp sound file and your Off-Throttle ramp sound file! Granular systems are cool like that.
Loop Systems: A More Creative Approach
If you’re using a Looping system, and you don’t have Off-Throttle loops you can switch between based on Game Throttle state, you need to get a little creative. For me, that means doing some real time DSP and Volume Automation to the On-throttle loops, based on Game Throttle. Here’s my general approach to this:
On-Throttle Sound Design
I want to hear Intake, Engine, and Exhaust as I recorded them. I might however, add a little distortion and low end boost when I’m at full throttle, though. If I have multiple camera perspectives to cover, I like to hear primarily Exhaust when I’m behind the car, and more Intake & Engine (but also Exhaust) when I’m on the hood or bumper of the car.
Off-Throttle Sound Design
Numerous changes happen when I’m Off-Throttle! If I have separate OnLoad & OffLoad samples, I can just crossfade between the Onload & Offload layers to reflect throttle state. Sometimes, I might kill the Onload layer completely when Off-throttle, but sometimes I might leave a little bit of the Onload layer audible to fill out the sound. The picture below of the volume automation for the 2 Exhaust layers is a good example of this. It all depends on the car.
-
- When Off Throttle, I get rid of the Intake sound. In the real world, your intake isn’t making any noise off-throttle (Superchargers and Turbos aside).
- I will also drop the Engine layer by a few dB off throttle, and probably try to EQ out some mid-low frequencies, to pull a little of the intake note out of the Engine layer.
- The Exhaust layer will need to change timbre and volume when you’re Off-Throttle. This will happen naturally if you’ve got separate On & OffLoad samples, but if you only have OnLoad samples to work with, a little creative DSP automation will be required. I start by dropping the OffLoad Volume by a few dB, then I’ll EQ out some 2k-ish midrange & 10k-ish treble, and might try and cut the area around the fundamental by a few dB as well. I’ll do this via real-time middleware DSP, and then return each EQ to unity when I’m back on the Throttle. Listen to your unedited source recording for reference here – the idea is to try and match the real-world off-throttle timbre as much as you can by using EQ and volume automation.

Exhaust Load Volume Automation in FMOD

Intake Load Volume Automation in FMOD
Beyond the Basics: Adding Realism
Once you have your car engine reacting well to in-game Throttle and RPM, you’re most of the way there – for some games, that might be all you need! For other games, you may need a deeper level of Engine detail, which includes things like; Forced Induction (Turbos & Superchargers), Exhaust pops & bangs, Transmission (gear whine) sound and Shift sounds, rev limiter sounds, etc…some games go to great lengths with their simulation detail, which I love. But, even for those games, the Engine sound is still the main thing, and hopefully I’ve armed you with enough info here to get you started.
Good luck and go make some car noises!
Test Files & Example Project
The BOOM Library folks recorded this Aston Martin V8 Vantage in an anechoic chamber, capturing both ramps and loops. You can find the raw files in the download link, as well as the loops integrated into an FMOD project.
